just how easy

In the bring your own pen device blog post I wrote that:
...the ability to scan arbitrary NFC tags in iOS devices was a holy grail in museum circles, always just around the corner but never actually possible.
The other holy grail, in museum circles, has been e-ink displays. Specifically the ability to craft and fashion low-cost and muted screens for public display in in the galleries as wall labels or as signage throughout the building. In 2013 you could find Amazon Kindles that had been repurposed as little advertising billboards in some restaurants in New York City so the thinking went: If a restaurant can do this why can't a museum?
At the time there were maybe a handful of vendors who might build these kinds of displays but they were surprisingly expensive. When compared to the cost of a Kindle they seemed shockingly expensive, even if that shock betrayed a lack of understanding about the manufacturing process and the scale of the effort and investment required to produce the Kindle. The issue of cost was compounded by a need to be able to update these screens automatically over the network, which again only serves to underline how much work Amazon did to deliver text over cellular networks to cheap, low-powered and, importantly, really thin computers. Even if you could solve the computing problem no one seemed to be producing e-ink displays much larger than index cards for anyone except Amazon.
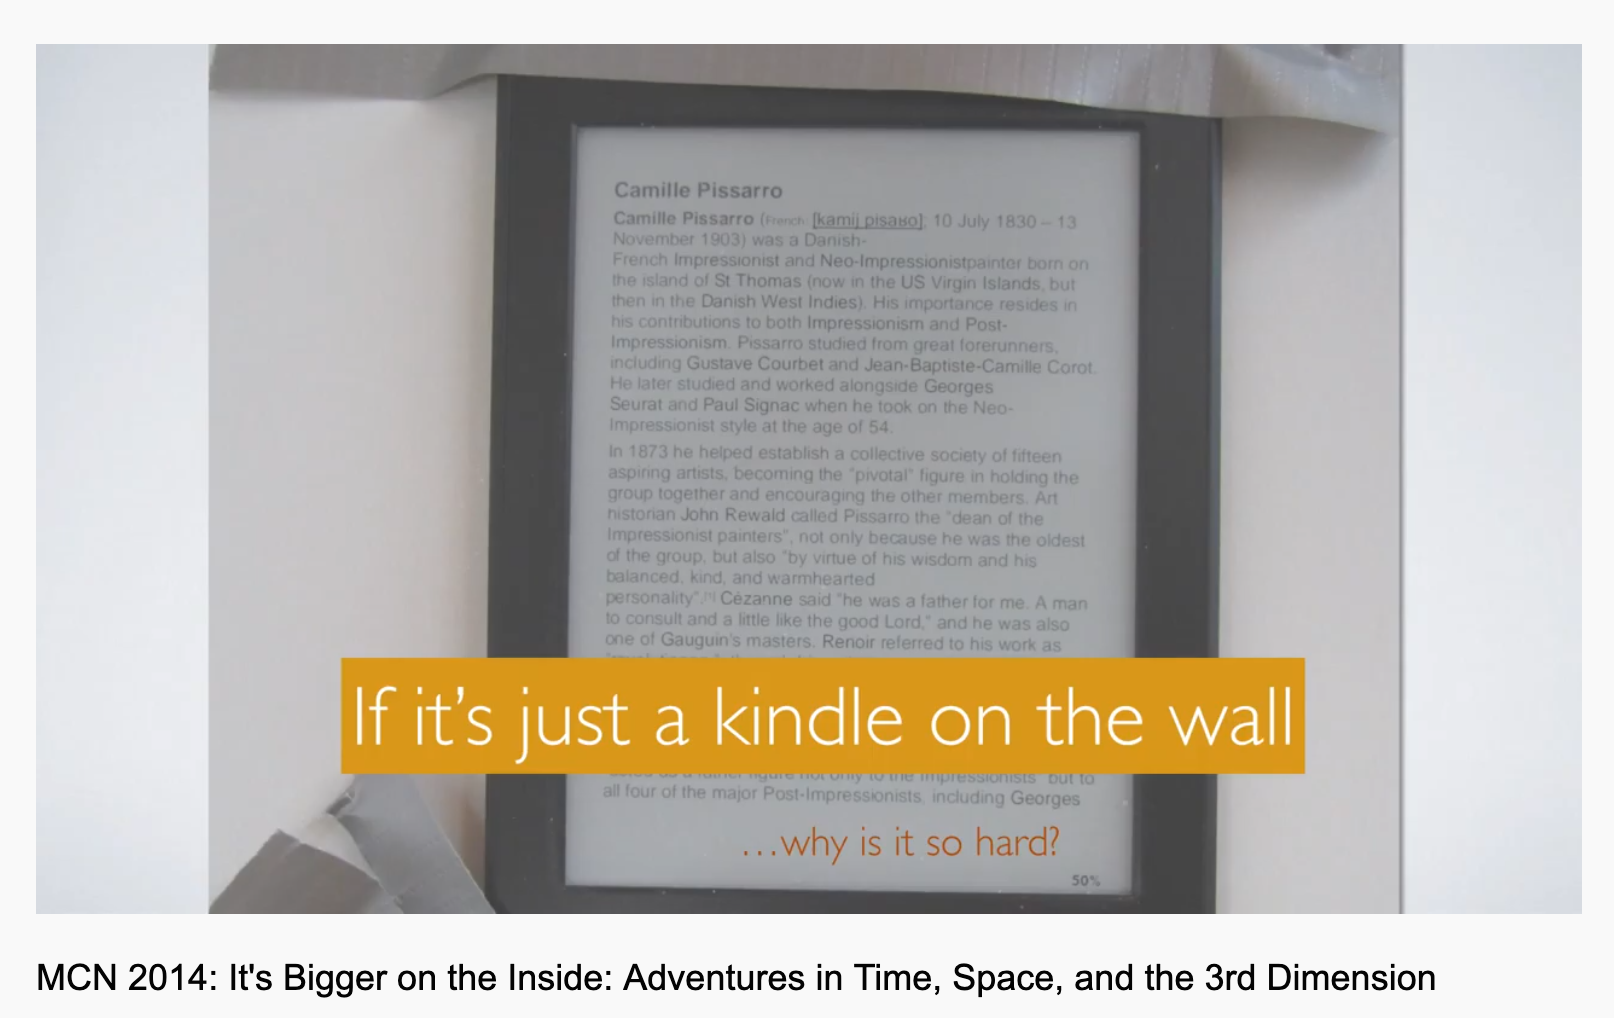
If you haven't already seen Miriam Langer and Stanley Cohen's presentation at MCN 2014 about their effort to develop an open-source, networked and museum-specific e-ink display to do all these things then you should watch it now. It starts at about the 34 minute mark and is an excellent presentation about, in their words, just how easy it was not to do
at the time. Go ahead, I'll wait.
Fast forward to the end of 2018 and Bryan Boyer's blog post titled Creating a Very Slow Movie Player:
Very Slow Movie Player (VSMP) is an object that contains a Raspberry Pi computer, custom software, and a reflective ePaper display (similar to a Kindle), all housed in a 3D-printed case. Every two-and-a-half minutes, a frame from a film that’s stored on the computer’s memory card is extracted, converted to black and white using a dithering algorithm, and then communicated to the ePaper display. The video below explains the process, but essentially, the film is played at a rate of 24 frames per hour in contrast to the traditional 24 frames per second. That’s the slow part, obviously.
Bryan's write-up about the rationale and development process for building VSMP is very good so if you haven't read that either yet you should go read it now. I'll wait.
Three things stuck out to me when I read Bryan's post. First, was that 7.5 inch e-ink displays had started to become available for retail purchase at affordable prices. Second, that they worked with plain vanilla Raspberry Pi computers and had high-level programming interfaces for updating the screens. Third, the wiring necessary to connect the display to the Raspberry Pi seemed refreshingly simple.
I walked around with Bryan's post in my head until a few months ago when I decided to see how hard it would be build my own VSMP or something like it. This was meant to be a mornings and weekends
project but the thinking was that if I could get something running for myself, during the margins of the day, then perhaps it could be repurposed for use in the cultural heritage sector. Perhaps the thing that Miriam and Stanley were trying to build in 2014 was now within our reach.

It is. There are still some rough edges but it can be done, not accounting for volume purchasing, for about 70$ a unit on the low end, 100$ on the high end and 80$ in between.
Waveshare produces a 800×480 pixel 7.5inch e-ink display that retails for about 65$ on Amazon. Importantly the display conforms to the Raspberry Pi HAT specification which means that it can simply be plugged in
to a Raspberry Pi computer. It's hard to overstate how important this is. Maybe it shouldn't be but from an operations perspective, in a museum, not having to muck about with about with wires and soldering reduces the complexity of things by an order of magnitude.
The Raspberry Pi itself could be as expensive as 35$ a unit if you need to do a lot of computing but it could also be as cheap as 5$ a unit for a low-powered Raspberry Pi Zero. The Zero ships without any network interfaces (ethernet or WiFi) and requires that you solder on the connectors for the display HAT to plug in to but for 14$ you can buy a Raspberry Pi Zero HW which comes with a pre-soldered connector and both WiFi and Bluetooth chips. Whether or not the extra 9$ is worth it is not for this blog post to decide.
To put that in some perspective Waveshare also sells a 10.3 inch HDMI-enabled e-ink display for 539$. It comes in an elegant enclosure with a bunch of different connectors but that's still 539$ without an actual computer to manage what the screen is doing.
I mentioned that e-ink displays have begun to ship with high-level interfaces, usually written in Python, for manipulating the screen. For example, here's how you would open an image file and render it on a Waveshare display using the Python libraries they provide:
from waveshare_epd import epd7in5_v2
from PIL import Image

fh = open("/path/to/image.jpg", "r")
im = Image.open(fh)

epd = epd7in5_V2.EPD()
epd.init()

epd.display(epd.getbuffer(im))
That's it.
It is the combination of pluggable hardware and high-level expressive programming languages for operating that hardware and being able to do so in a traditional Unix operating system that makes all of this exciting. It means that the code and the hardware above is, effectively, the common platform that any museum or cultural heritage institution can use to deploy e-ink displays.
Where /path/to/image.jpg comes from and how often it gets updated are details that will vary from institution to institution. Those images might come out of a centralized content-management system or be generated dynamically on the device. They might be delivered over the network or retrieved out of a local cache on disk. The advantage of a full-fledged Unix operating system rather than a smaller, trimmed down programming environment is that they make developing for these bespoke scenarios easier and faster and the place where those custom tools intersect with the screen is a simple image. The screen itself doesn't need to know, or care, where an image comes from.
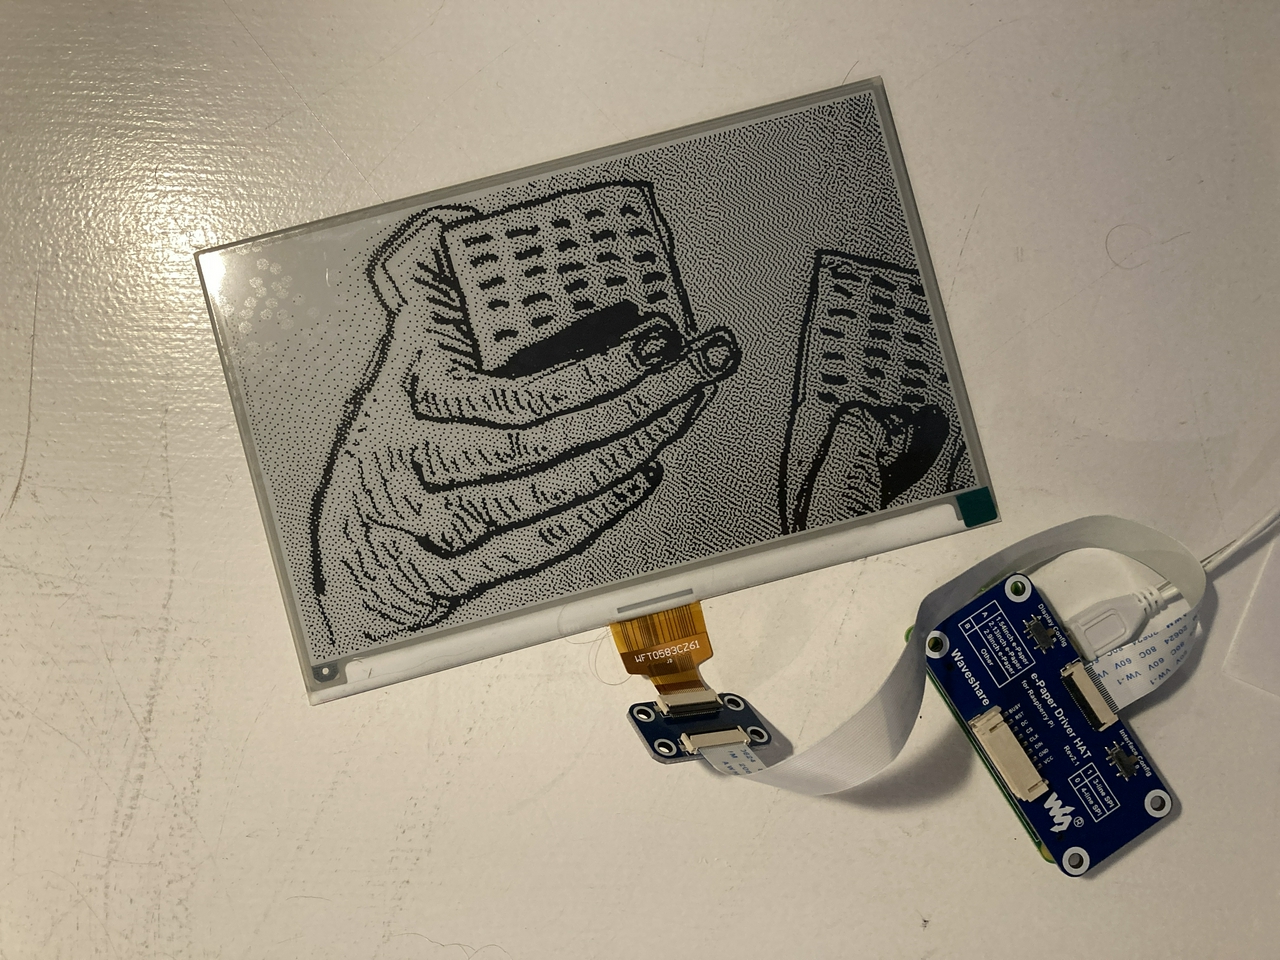
Here's an object from the SFO Museum collection:

I mentioned that there are still some rough edges to all of this. Power is an obvious concern. A Raspberry Pi, even a Pi Zero not doing anything except replacing an image every hour, will drain a standard USB battery inside of a day. The consequence of that is that when installing one of these displays you'll need to factor in and account for, and possibly hide, a micro-USB cable running back to a power source.
The other noticeable rough edge is that the refresh rate on the Waveshare screen is, well, noticeable. I haven't spent any time yet investigating whether this can be remedied with code or hardware so the rule of thumb might just be: Don't update the screen very often or when a lot of people might be looking at it.
Here's a video showing what the refresh rate between images looks like:

Finally, this is all very much a work in progress so there are no simple or easy installer
tools. I've been keeping notes and tools to display random images, on a timer, from a local wunderkammer
database in a py-wunderkammer-waveshare repository. The screen that I am building is meant to run entirely offline so all the images are bundled as base64-encoded data URLs, as described in the so that it may be remembered blog post.
The tools for generating these wunderkammer
style databases have also been separated in to discrete packages. They are:
- go-wunderkammer, which contains tools for producing database from a stream of line-separated OEmbed (JSON) records.
- go-wunderkammer-image, which contains tools for appending a base-64 encoded image to a stream of line-separated OEmbed (JSON) record.
- go-wunderkammer-www, which contains tools for viewing the contents of a database produced by
go-wunderkammer.
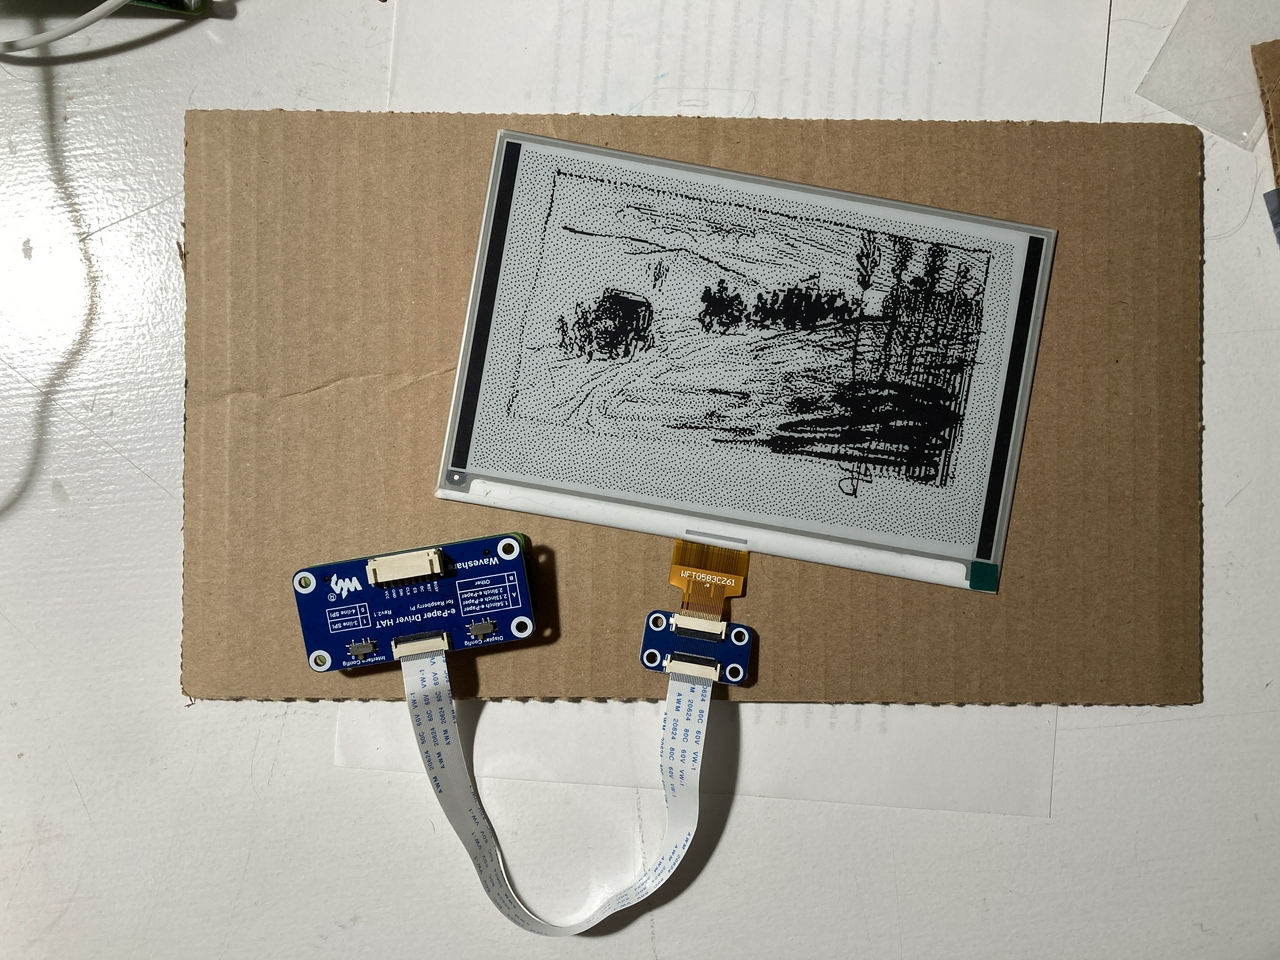
Here's an example of how it all fits together producing an offline-enabled wunderkammer
database of objects from the Hirshhorn Museum and Sculture Garden collection, where each image is retrieved from the Smithsonian servers and dithered for better rendering on an e-ink display:
$> sqlite3 /usr/local/go-wunderkammer/hmsg.db < /usr/local/go-wunderkammer/schema/sqlite/oembed.sql

$> /usr/local/go-smithsonian-openaccess/bin/emit \
	-oembed \
	-bucket-uri file:///usr/local/OpenAccess metadata/objects/HMSG \

   | /usr/local/go-wunderkammer-image/bin/append-dataurl \
	-dither \

   | /usr/local/go-wunderkammer/bin/wunderkammer-db \
	-database-dsn 'sql://sqlite3/usr/local/go-wunderkammer/hmsg.db'
In addition to the go-wunderkammer tools this example uses the go-smithsonian-openaccess's emit tool described in the everyone gets a wunderkammer! blog post. There is also a similar tool in the go-metmuseum-openacess package for working with the Metropolitan Museum of Art's Open Access Initiative data.
And here's what the result of that example looks like. In this photo the e-ink display HAT has been plugged in to a Raspberry Pi Zero which isn't visible since it's the same size as the HAT iself. The pencil is included for scale. The total height of the Pi Zero and the display HAT stacked together is about 1.5 inches.

The device isn't powered on in this photo but since it's an e-ink display it doesn't need power to keep showing the last image that was rendered to the screen.
In addition to dithering images the append-dataurl tool has the ability to do content-aware resizing (or seam carving) using Endre Simo's caire library. Content-aware resizing can be useful if you want an image to fill all the available screenspace without cropping the image. The results are still mixed.
For example, this is probably an acceptable resizing given that the photo was actually shot in portrait mode:

Whereas this is probably not:

And this is just weird and a little scary, with apologies to the National Air and Space Museum (NASM) collection:

Speaking of NASM, I also created a wunderkammer
style database of their collection like the one I created for the Hirshhorn but without image dithering and used it to run an instance of the wunderkammer-server tool, like this:
$> sqlite3 /usr/local/go-wunderkammer/nasm.db < /usr/local/go-wunderkammer/schema/sqlite/oembed.sql

$> /usr/local/go-smithsonian-openaccess/bin/emit \
	-oembed \
	-bucket-uri file:///usr/local/OpenAccess metadata/objects/NASM \

   | /usr/local/go-wunderkammer-image/bin/append-dataurl \
	-format gif \

   | /usr/local/go-wunderkammer/bin/wunderkammer-db \
	-database-dsn 'sql://sqlite3/usr/local/go-wunderkammer/nasm.db'

...time passes

$> /usr/local/go-wunderkammer-www/bin/wunderkammer-server \
	-database-dsn 'sql://sqlite3/usr/local/go-wunderkammer/nasm.db'
Then, for example, if I visit http://localhost:8080/object?url=si://nasm/o/A19480187000 in a web browser I see this:

There are actually four images for this object but I've trimmed the screenshot. As with the e-ink display example all of the images are being served locally from the wunderkammer
database having been retrieved from the Smithsonian image servers by the append-dataurl tool.
The wunderkammer-server tool has the ability to show individual images as well as all the images for a given object. The tool is currently lacking pagination which will happen shorty since since some collections have may have dozens of images for a single object. It also comes with a handy random button for general spelunking. There's more to write about the wunderkammer-server tool but I'll save that for another post.
Today, let's just enjoy the knowledge that e-ink displays aren't as hard as they used to be.
This blog post is full of links.
#easy